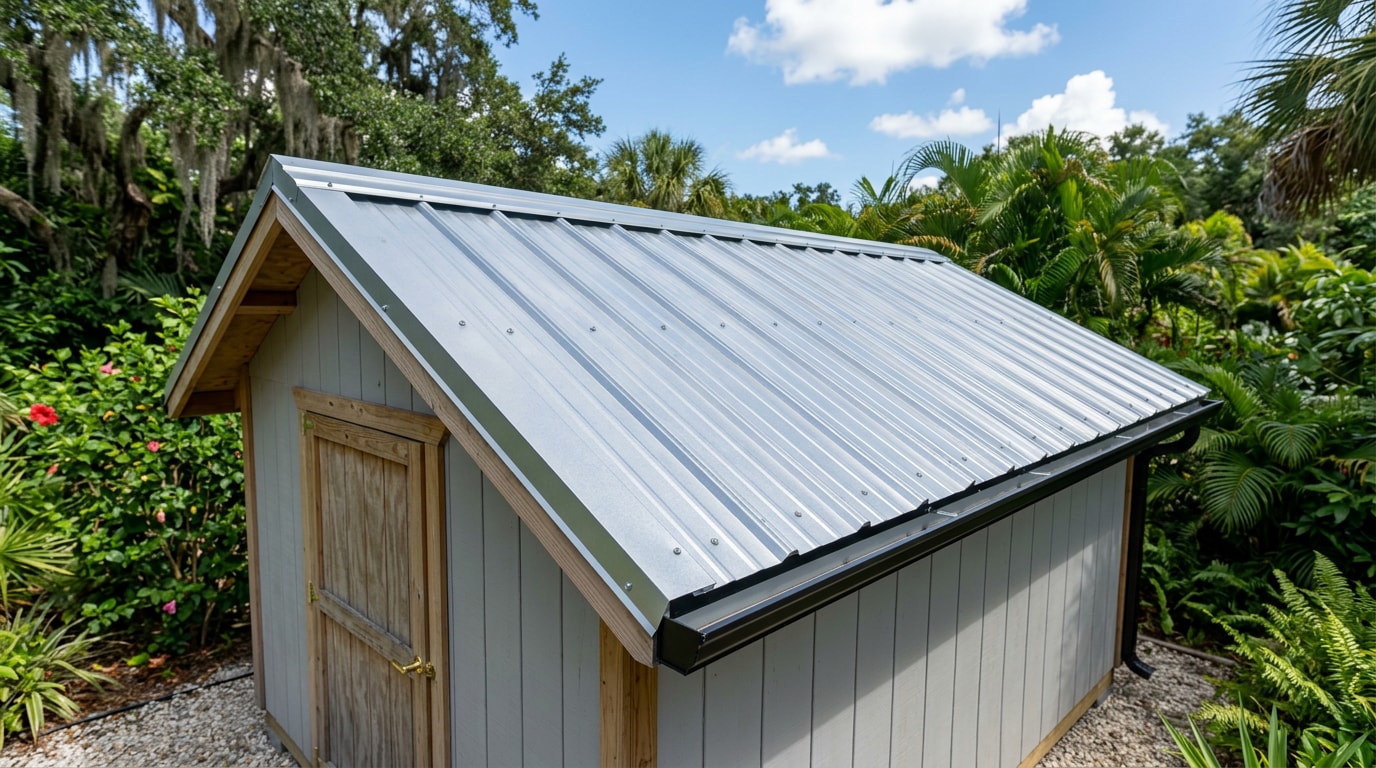
Installing metal roofing on a shed in Crawfordville, FL means building for Wakulla County's wind-driven rain and summer humidity, not just curb appeal. Our crews have torn off enough storm-damaged shed roofs across Wakulla County to know exactly which shortcuts cause leaks within a year. This guide covers permits, materials, every installation step, and the mistakes that turn a weekend project into a repeat job.
Do You Need a Permit in Wakulla County First?
Skip this step and you risk a stop-work order halfway through the job.
Florida's state building code relaxes certain construction standards for small storage sheds, but that doesn't mean your county drops the permit requirement. Wakulla County still reviews most accessory-structure and re-roof work through its own checklists before you touch a panel.
The county's building department keeps a Pole Barn/Shed checklist separate from its Re-roof checklist , so don't assume the paperwork for a house re-roof covers your shed project too. The department's core job is review and issuance of building, mechanical, electrical, plumbing, roofing, and other construction-related permits , which includes shed roofing in most cases.
Before you order a single panel, call the Wakulla County Building Department to confirm which checklist applies to your shed's size and use. If you'd rather hand the paperwork to a licensed crew, get a free estimate and we'll handle the permit alongside the install.
Why Metal Beats Asphalt for a Wakulla County Shed
Shed owners choose metal over asphalt shingles for one main reason: it shrugs off wind-driven rain and needs almost no upkeep once it's on. Steel roofing manufacturers and industry researchers have documented steel roofs lasting as long as the buildings they cover, typically 60 years or more , when installed correctly.
| Material | Typical Lifespan | Approx. Material Cost (2026, per sq. ft.) | Maintenance |
|---|---|---|---|
| Exposed-fastener metal panels | 40–60 years | $3–$6 | Minimal |
| Standing seam metal | 40–70+ years | $5–$9 | Minimal |
| Asphalt shingles | 15–25 years | $1.50–$3.50 | Moderate |
| Wood shingles | 20–30 years | $4–$7 | High |
That gap widens further once you count avoided repair trips. Labor on a small structure like a shed typically runs a few dollars per square foot on top of materials, so a DIY install can shave a real chunk off total project cost versus hiring it out, provided you have the tools and the patience to do it right. If you want a deeper cost breakdown across roofing materials, our cost guide for St. George, FL walks through pricing tiers in more detail.
Tools and Materials You'll Need
Gather everything before you climb up so you're not making hardware-store runs mid-project.
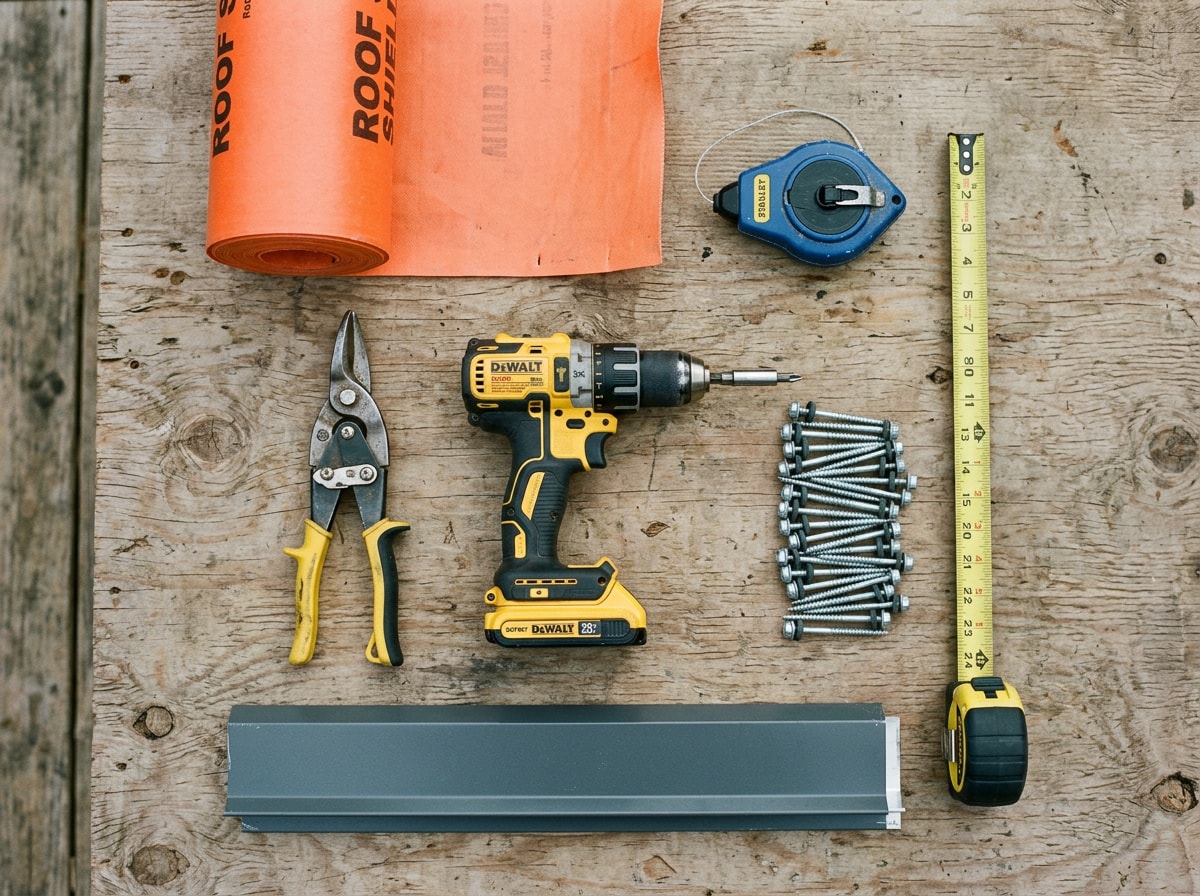
Tools:
- Tin snips or a circular saw with a metal-cutting blade
- Cordless drill with a magnetic screw bit
- Tape measure and chalk line
- Sturdy ladder rated for the job
- Work gloves and safety goggles
Materials:
- Metal roofing panels, cut to your longest roof slope when possible
- Rubber-washer roofing screws
- Synthetic or felt underlayment
- Drip edge trim
- Foam closure strips
- Ridge cap
- Roofing sealant
Underlayment and sealant get skipped by some DIYers trying to save a few dollars. On a Florida shed, that's a bad trade. Skipping either one invites trapped moisture and rot within a couple of rainy seasons.
Preparing and Inspecting the Shed Roof
Strip the old roofing material down to the deck before anything else goes up. Check the decking and rafters for soft, discolored, or spongy wood as you go. Rotted framing won't hide under new metal panels; it'll just fail faster once the weight and fasteners are added.
Roof pitch matters just as much as the frame. Under the International Residential Code, the minimum slope for lapped, nonsoldered-seam metal roofs without applied lap sealant is 3 units vertical in 12 units horizontal, a 25-percent slope . Anything flatter can't shed water fast enough through an exposed-fastener system, which is what most shed roofs use.
In Crawfordville, that minimum isn't just a code checkbox. Heavy summer rain and hurricane-season gusts stress marginal slopes and loose fasteners faster than they would in a drier climate. If your shed's existing pitch is borderline, reinforce the frame or adjust the trusses now, not after the first named storm finds the weak spot. A quick professional roof inspection before you buy materials can save you from rebuilding the frame mid-project.
Step-by-Step Installation Guide
Once the frame checks out, the sequence is straightforward: measure, underlayment, trim, first panel, remaining panels, ridge cap.
1. Measure the Roof and Calculate Materials
Measure each roof slope separately, length and width, then multiply for square footage. Divide by 100 to get your roofing squares, the standard unit panels are priced and ordered by.
Order panels cut to the full slope length when you can. Horizontal seams are a common leak point, and avoiding them is worth the extra lead time. Add roughly 10% extra material for cutting waste, and account for 1–2 inches of overhang at the eaves in your total coverage math.
2. Install the Underlayment
Roll out underlayment starting at the eave and working toward the ridge, keeping rows horizontal. Overlap each row by 4 to 6 inches over the row below it. Secure it with staples or cap nails every foot or so.
In Florida's humidity, a continuous underlayment layer also cuts down on condensation forming against the underside of the panels, which matters more here than in drier states.
3. Install Drip Edge
Attach drip edge trim along the eaves before any panels go down, screwed every 12 to 18 inches. This directs runoff away from the fascia and decking instead of letting it wick back underneath.
Install rake trim along the gable ends the same way, right after the eave drip edge. Skipping this step is one of the fastest routes to rot at the roof edges within a couple of rainy seasons.
4. Cut and Place the First Panel
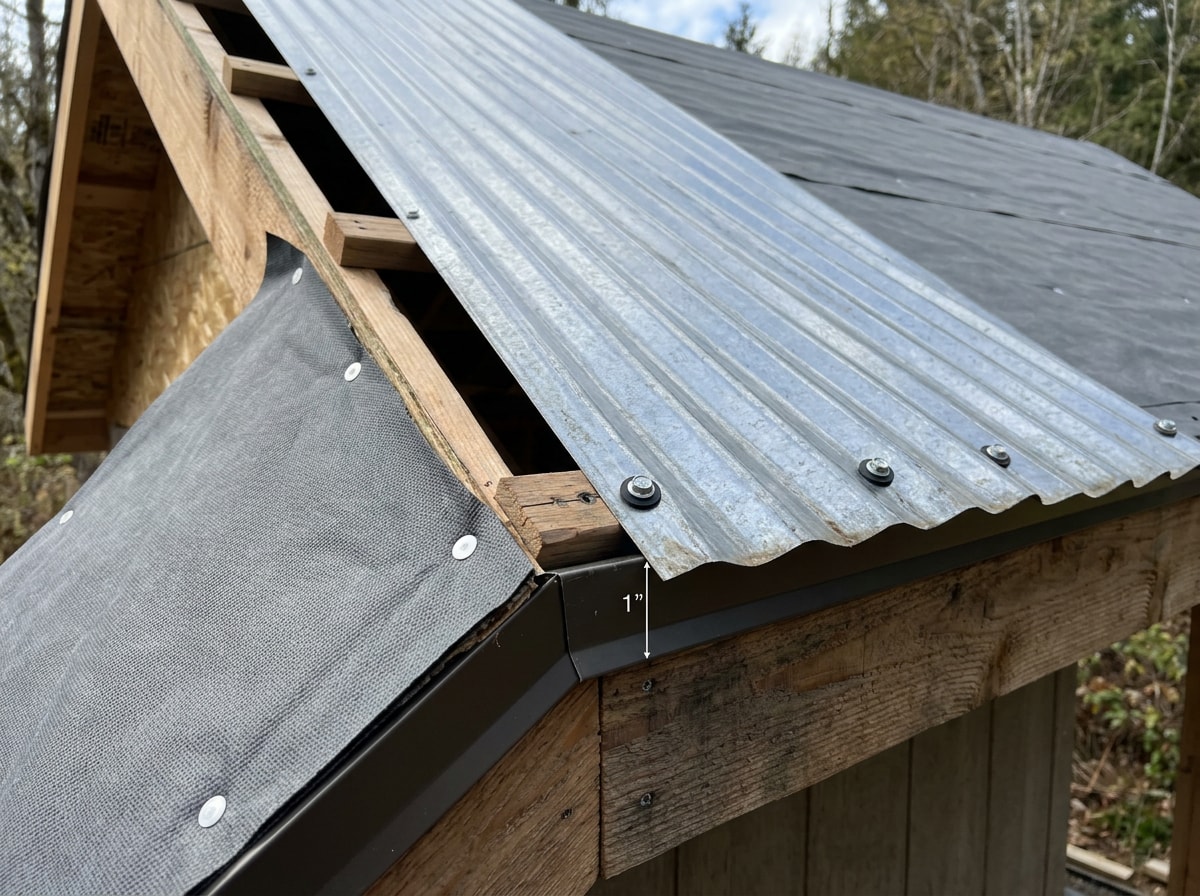
Cut panels to size with tin snips or a metal-cutting blade. Set the first panel square to the roof edge with about a 1-inch overhang past the drip edge.
This first panel is the most important placement in the whole job. A panel installed even slightly out of square throws off every panel that follows, leaving crooked seams and gaps by the time you reach the far edge of the roof.
5. Secure and Overlap the Remaining Panels
Drive roofing screws through the flat part of each panel, never through the raised rib, spacing fasteners every 12 to 18 inches along the edges and every couple of feet in the field. Each new panel should overlap the previous one by one full rib for a weathertight seal.
Keep the drill perpendicular to the panel. A screw driven at an angle strips the rubber washer and creates a sealing gap that's hard to spot until the next heavy rain finds it.
6. Install Ridge Cap and Closure Strips
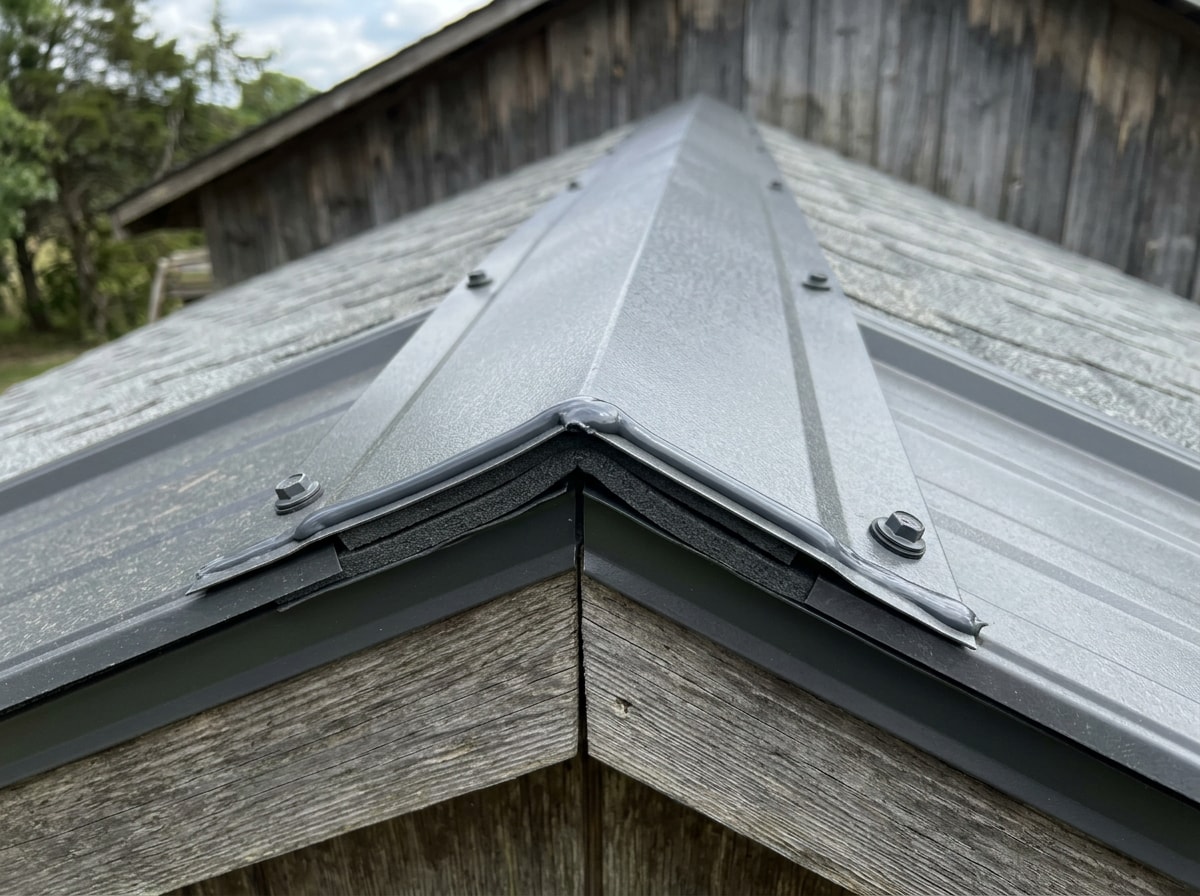
Slide foam closure strips under where the ridge cap will sit to block wind, dust, and insects from the gap at the peak. Center the ridge cap over the peak and fasten it through the panel ribs on both sides, never through the flat.
Overlap ridge cap sections by a few inches and run a bead of sealant at each joint. For fastening patterns and wind-uplift details beyond what's in a generic manufacturer insert, the Metal Construction Association's technical library is a solid reference for serious DIYers.
Tips for a Successful Install
- Work cool, dry mornings when possible. Florida afternoon heat makes metal panels uncomfortable to handle and humidity makes screws slip.
- Wear gloves the entire time. Cut panel edges are sharp enough to draw blood fast.
- Don't overtighten screws. A crushed rubber washer no longer seals, which defeats the entire point of using sealed fasteners.
- Snap chalk lines before fastening each row so panels stay straight instead of drifting diagonally.
- Start from the leeward side, away from prevailing wind, so panels don't catch wind like a sail mid-install.
- Pick a light or reflective panel color if the shed sits in full sun. ENERGY STAR-qualified roof products are documented to
reduce the amount of air conditioning needed in buildings, with energy bills cut by up to 50% in some cases , and that reflectivity helps even on an unconditioned shed by keeping stored tools and equipment cooler.
Common Mistakes to Avoid
Most shed roof leaks trace back to a handful of avoidable errors.
Misaligned panels. Uneven rows compound into visible gaps and water intrusion points by the time you reach the ridge. A chalk line snapped before each row prevents this drift entirely.
Bad fastener tension. Over-tightening damages the rubber washer and the panel hole itself. Under-tightening leaves panels loose enough to lift in wind. Both show up as leaks within a season or two, so aim for snug, not crushed.
Skipping underlayment to save money. It's the cheapest line item on the materials list and the first thing you'll wish you hadn't cut when a seam leaks during a tropical storm.
Ignoring the frame. New metal over rotted rafters just delays the failure, it doesn't prevent it.
DIY or Hire a Pro?
A single-slope shed with easy ground access is a reasonable weekend DIY project for someone comfortable on a ladder and a drill. A shed with a steep pitch, multiple roof planes, or visible rot in the frame is a different story.
If the inspection in step one turns up structural problems, or if you'd rather not spend a Saturday on a roof in Florida heat, a licensed crew can usually complete a shed roof installation in a fraction of the time it takes a first-time DIYer, with the fastening and flashing details already dialed in. Contact us for a free estimate if you want the frame checked and the roof installed in one visit.
FAQ
Do I need a permit to install metal roofing on a shed in Crawfordville, FL?
Usually yes, though the exact threshold depends on your shed's size and use. Wakulla County maintains a separate Pole Barn/Shed checklist from its standard re-roof checklist, so confirm with the county building department before you start.
Can I install metal roofing over an existing roof?
It's technically possible but not recommended for sheds. Removing the old roofing first lets you confirm the deck is sound and avoids trapping moisture between layers, which causes hidden rot that's far costlier to fix later than a proper re-roof.
Is metal roofing suitable for all types of sheds?
Metal fits most sheds, provided the roof has at least a 3:12 slope for exposed-fastener panels and the frame can support the panel weight. That applies whether it's a storage shed, workshop, or garden shed.
What do you put under metal roofing on a shed?
Use synthetic or felt underlayment over a solid deck. If the shed has open purlins instead of solid sheathing, add a vented closure strip system instead of standard underlayment.
How much does it cost to install metal roofing on a shed?
Materials, fasteners, and underlayment for an exposed-fastener metal panel roof typically run $3 to $6 per square foot, with standing seam running higher. DIY installation avoids the labor markup, which is usually the biggest line item on a professional quote.
How long does it take to install a metal roof on a shed?
A single-slope shed roof with simple access usually takes a motivated DIYer one full day, including tear-off and underlayment. A licensed crew typically finishes the same job in a few hours.
Ready to skip the ladder time? Get a free estimate from Alpha One Roofing Tallahassee, or visit our homepage to see the full range of roofing and construction services we bring to Crawfordville and the rest of the Florida Panhandle.